Day: August 3, 2009

Creating LINQ Datasource in project Part – 1

INTRODUCTION
Here I will introduce to you with the new concept of .NET 3.5 i.e. Many people have heard about LINQ but very few people know about LINQ.

I will post a series of examples of LINQ in my blog. To start with I will show you how to add LINQ datasource into the project.

EXAMPLE
Create one demo project. Create a database connection and connect to your database as shown in the below figure.
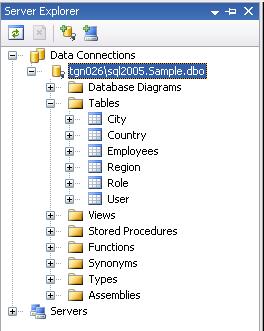
connection

Then add the Linq to sql class file (.dbml file) in to the solution.
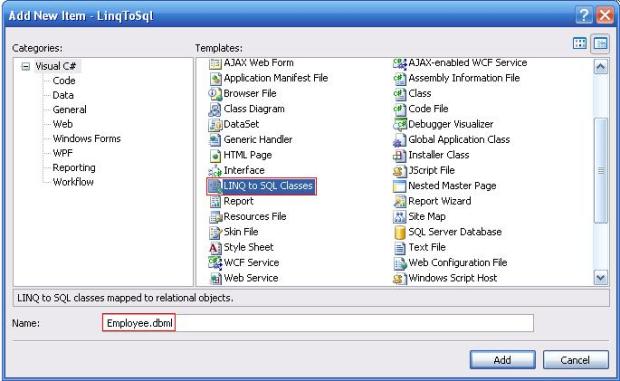
Adddbmlfile

By default it will be placed in the App_Data folder as shown below.

App_data

Open .dbml file and drag & drop the tables from the server explorer in the .dbml file. The .dbml file will look something like this.
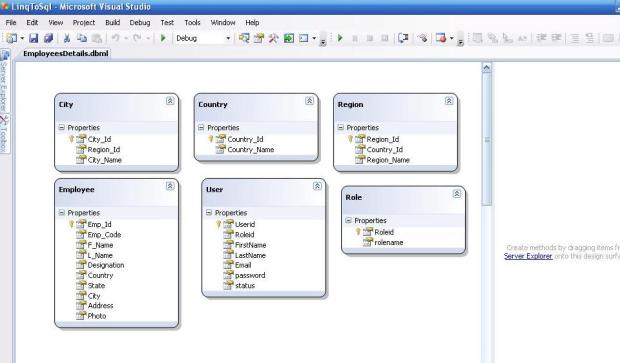
DBMLFILE

.dbml file is a Linq datasource file. The datasource file creates the tables’ column property by default when you drag the table in the .dbml file.

The property is defined in .designer.cs file as shown below.

designer_cs
The Linq datasource maps to your database and creates the property for the respective table columns which you have drag into the .dbml file.

Now create the context for your datasource which you will be using it in your code. For that create the instance of your connection and add it to your Context at the top of .aspx.cs file.

public static string conn = ConfigurationManager.ConnectionStrings[“SampleConnectionString”].ToString();
EmployeesDetailsDataContext DetailContext = new EmployeesDetailsDataContext(conn);

Now you can start with further coding work with linq.
In the next part I will show you how to insert data through Linq query.Access the following link for next part.

Display images in a thumbnail view

INTRODUCTION
Sometimes it might so happened that developers want to upload photos and display it in a web form in a thumbnail view.

SOLUTION
I will demonstrate here a small example of uploading photos through file upload control and displaying it in a datalist control without use of database.

To start with create a small demo project .Add one image folder to it where the photos will get uploaded.

The demo project will look something like this.

1

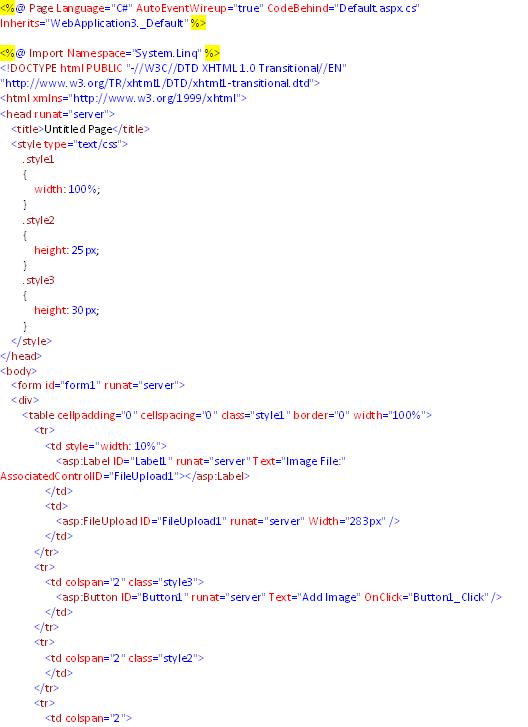
First add one web form page to the solution and add one file upload control and datalist control as shown above.

The following is your HTML page.

2

Secondly, add the following method to the aspx.cs file.

3

The above method is used to check the file type of the images while uploading. The images with the following displayed extension will be allowed to get uploaded.

4

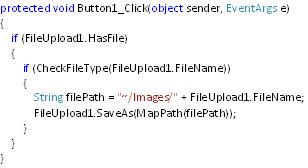
The following code on the click event of a button is used to upload files to the respective folder. In this example the images are uploaded and saved in the images folder.

5

As soon as the images is uploaded it is displayed on the webform page in a form of a thumbnail view.

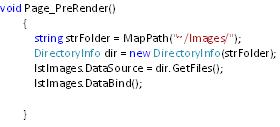
In the above code the datalist control is map with the images folder where the images are uploaded.

Then the datalist control is bind to the directory(folder) where it is saved.

So as soon as the images are uploded it will start displaying in datalist control in form of a thumbnail.

You can download the demo project from the following link